Content begins here
Main page content
Click to collapse
Particular photo editing and use of digital tools to improve the images obtained
This module will explain how to edit the multimedia project. Therefore, it is focused both on learners who complete the full training of the photography module within the technical section of the educational platform as well as those who, having previous knowledge of photography and sound, want to know how it should be edited, and finalize the audiovisual project.
Once the module is completed and approved, learners will be able to:
- Develop the photographic project associated with the chosen heritage reality.
- Edit the project, through the correct use of the photos, the audio of the script in voice-over and the music selected in various sound tracks.
- Create their own videos that will give them the opportunity to practice the use of ICT.
In this session, we will learn to analyze and edit the images we have obtained to improve their quality before doing the audiovisual project.
In the third tutorial, we will learn to edit and assemble the project; but first, we have to learn to edit the photo that will be the main component of the entire video.
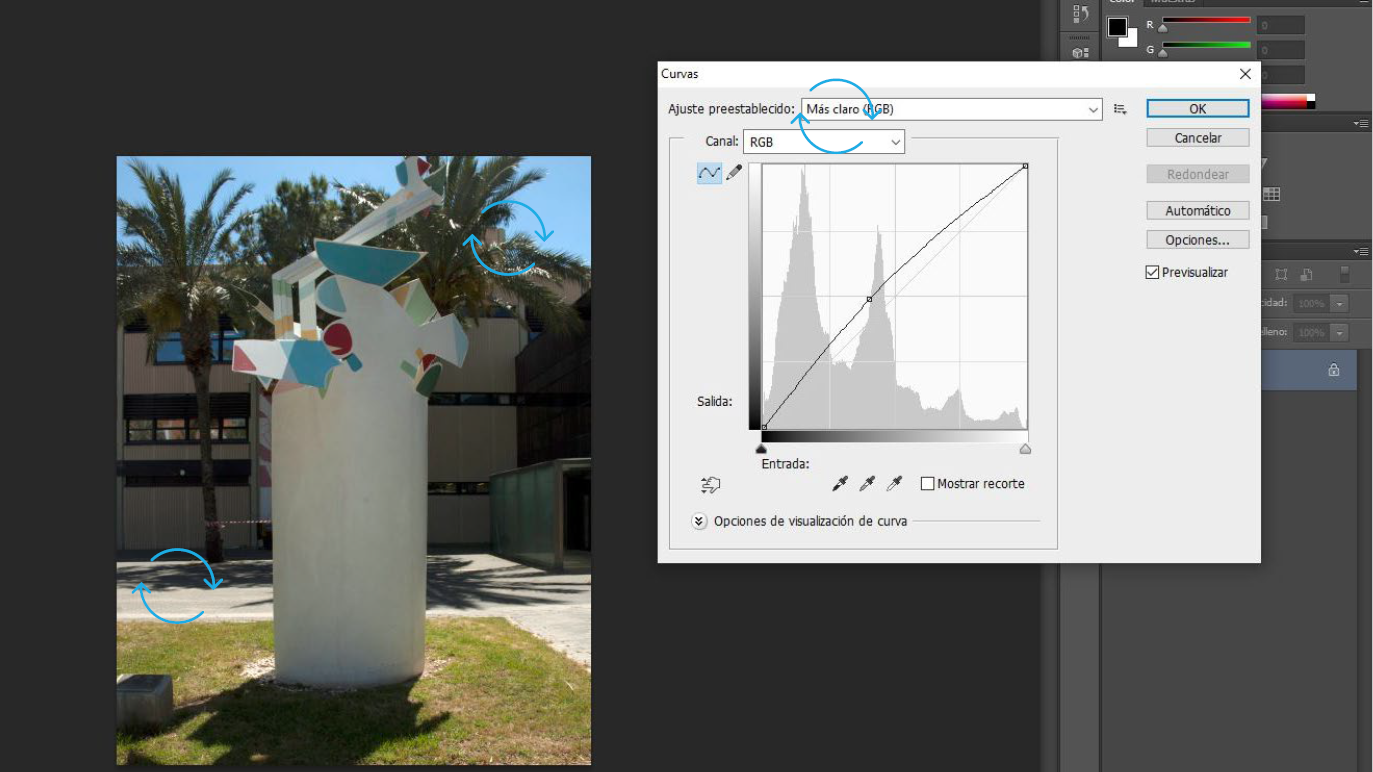
What would you correct from the next photo?
- Think about the rule of thirds and that the object is horizontal
- Is the photo too dark or light? Is it underexposed or overexposed?
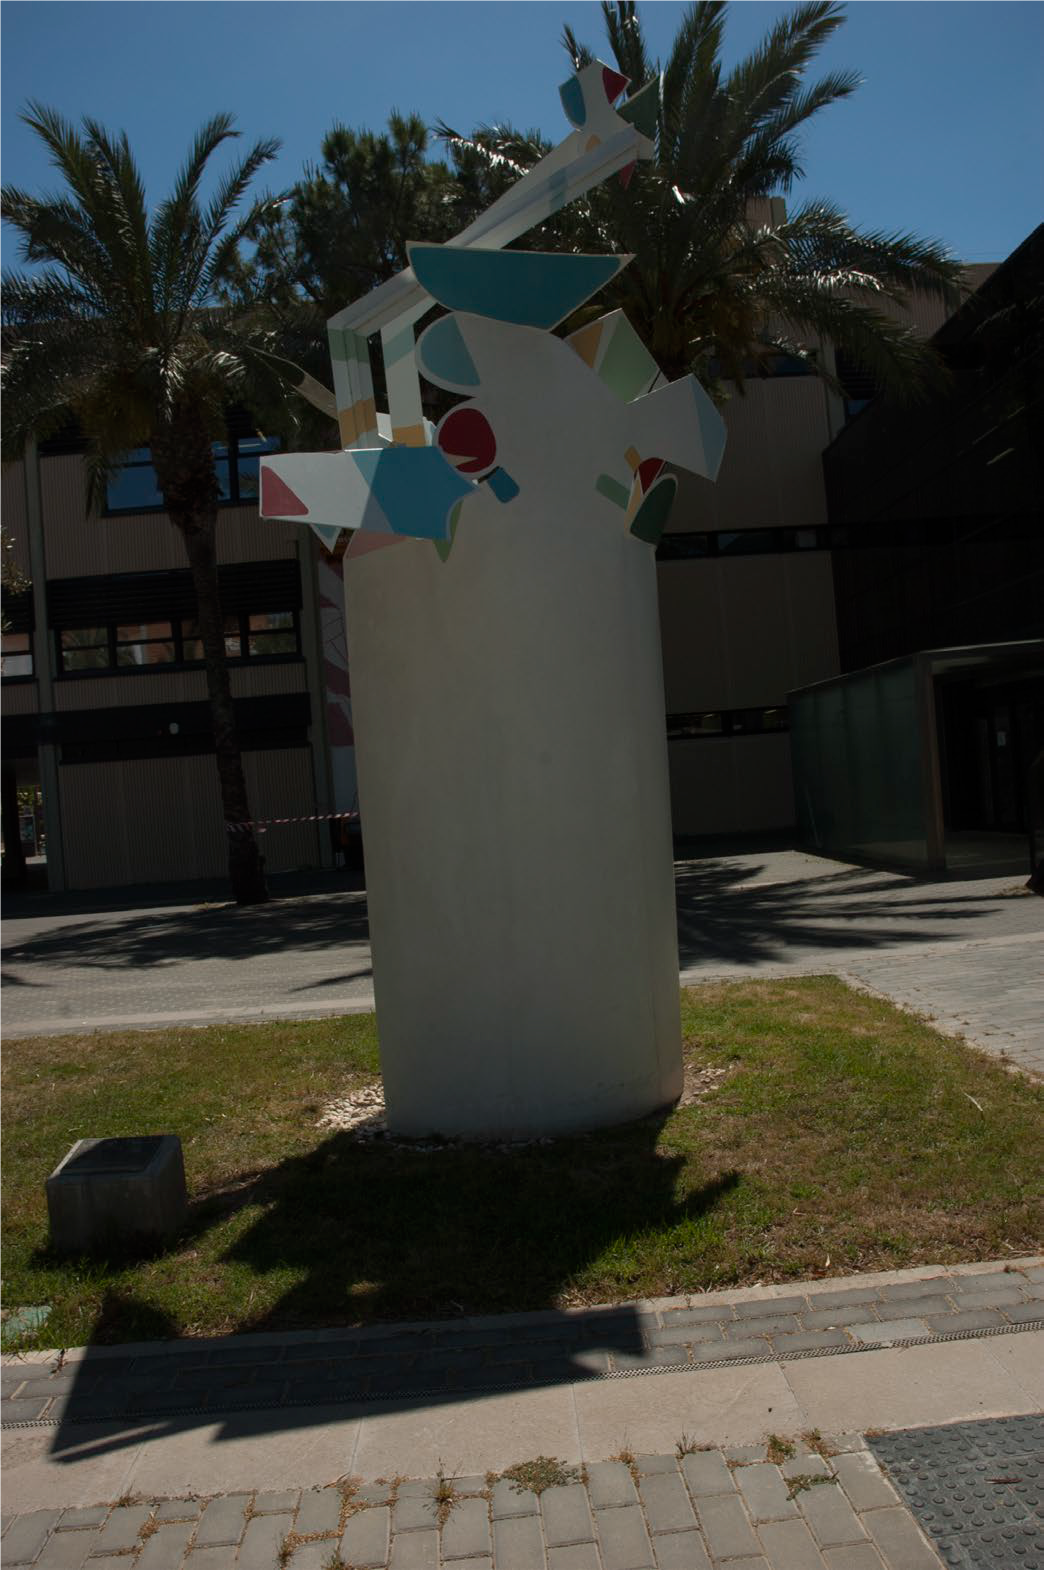
Exactly, we must apply the concepts of composition and technique.
- The sculpture must be placed vertically
- We have to touch up the light of the image
- We must cut the image below
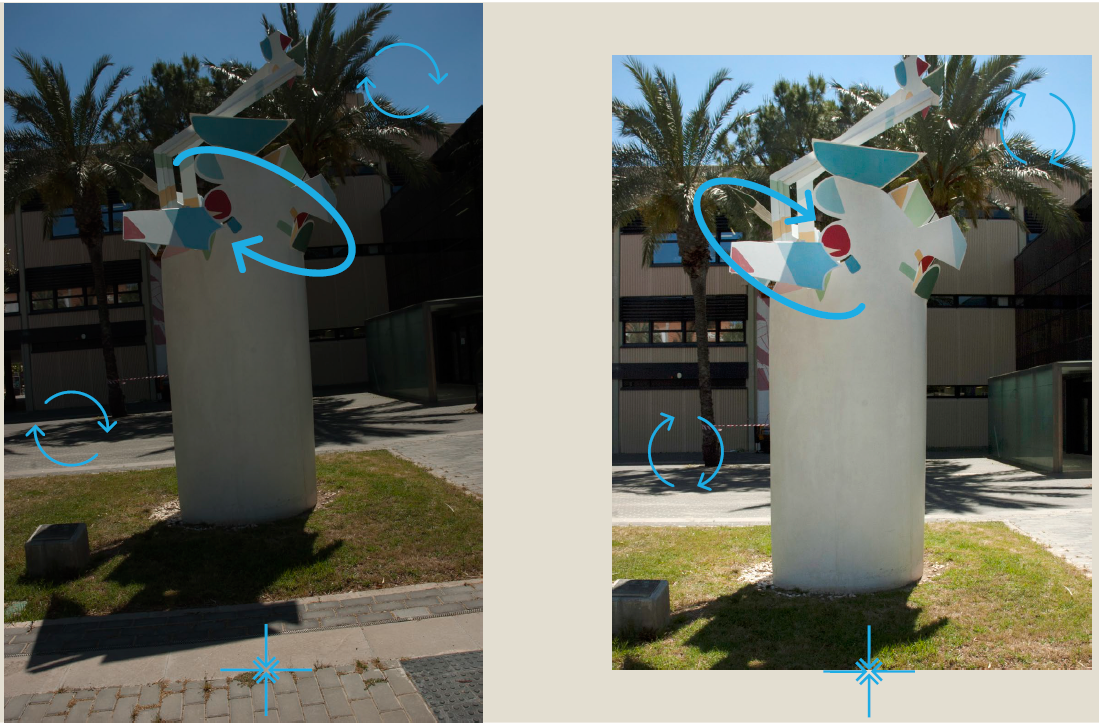
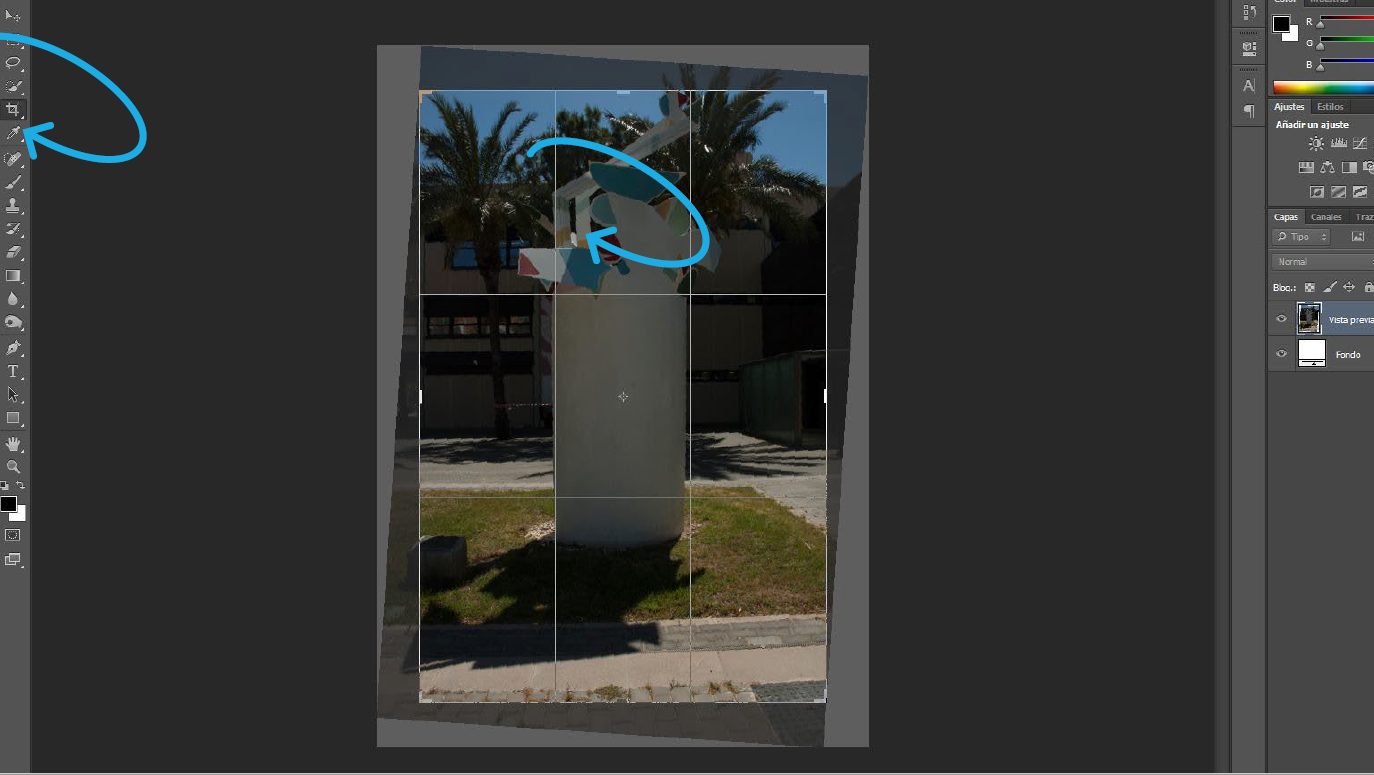
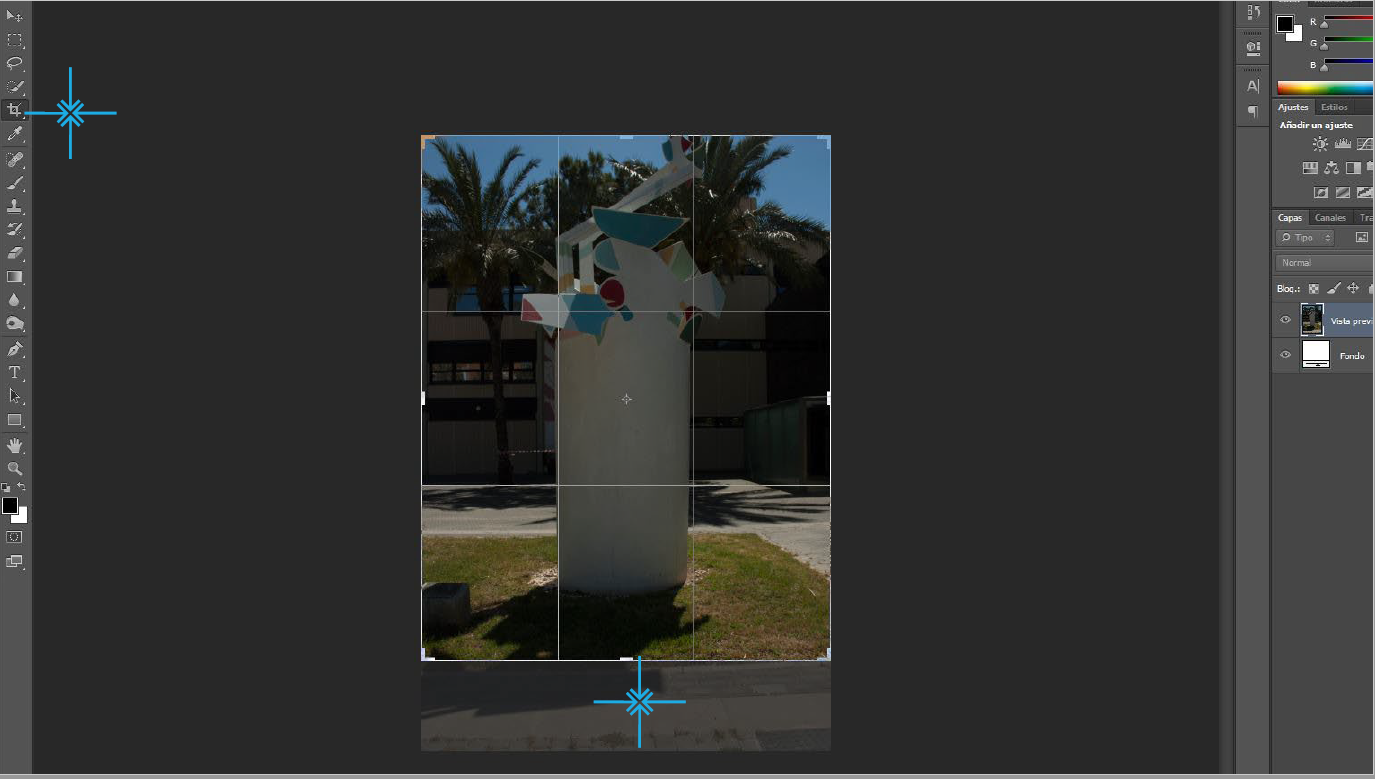
How do we do it?
First of all we are going to work with any editing software. One possibility is the GIMP application, but it can be any other that allows us to work online without having to download the program.
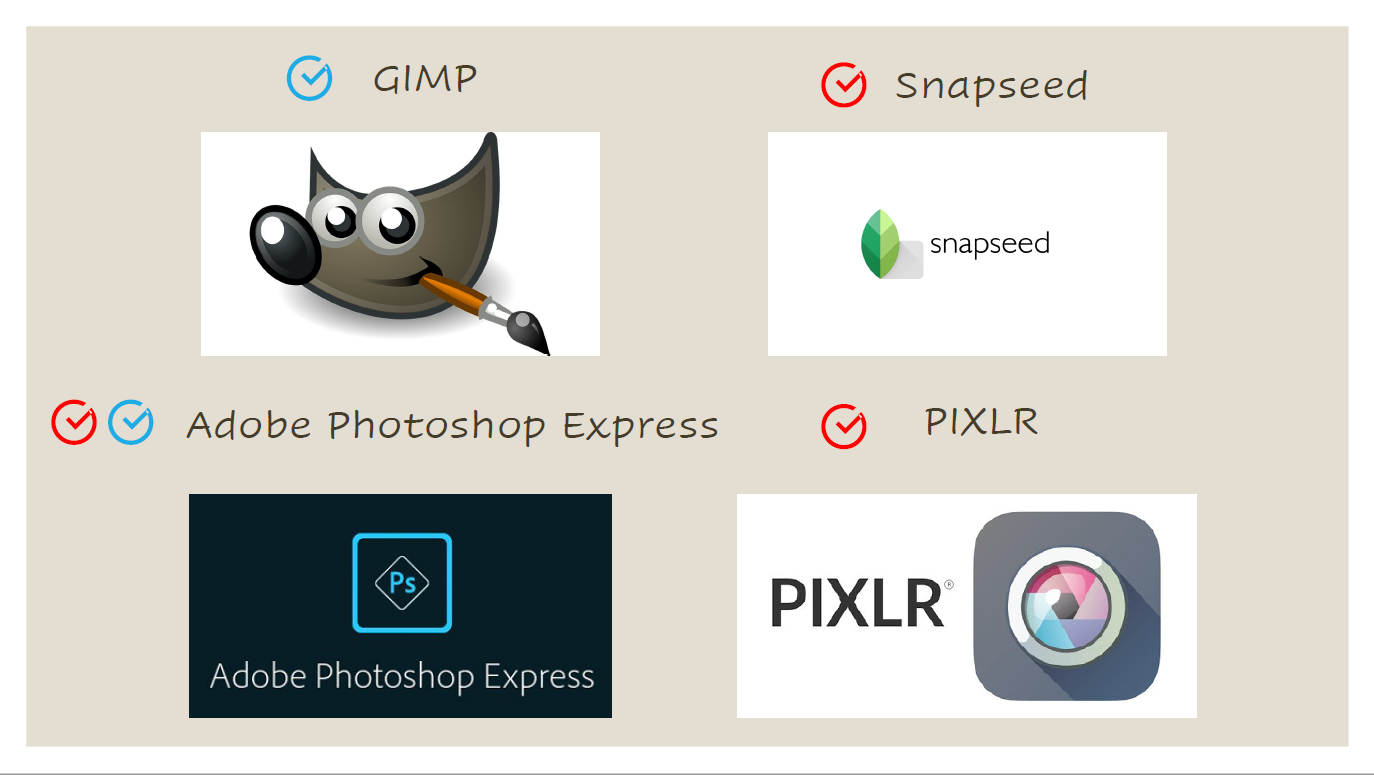
What are the best applications or software to edit images?
There are two types of tools:
- To work online
- To download and install on the computer or mobile phone
Conclusions
The final quality of the photo that we take will be equal to the final quality of the audiovisual project that we propose. It is necessary to communicate the message clearly, both in the photo and in the script.
Video and PDF presentationClick to collapse
The following video explains the content of this lesson and shows some examples:
Video T3.L1. Photo-editing
Here you have the content of the video in pdf in case you need to use it in your classroom:
Pill 1. GimpClick to collapse
Pill 1. Gimp
The following video shows how to use Gimp to edit an image.
Lesson contents in PDFClick to collapse
Here you have the contents of the lesson in PDF: