Content begins here
Contenido de la página principal
Pulsa para colapsar
Natural Lighting
In this lesson, we will learn:
1. What Natural Lighting is and why it is important
2. Basic Rules of lighting
3. Natural Light Types: Rembrandt Lighting, Split Lighting and Backlighting
4. How to improve your Natural Light result
WHAT NATURAL LIGHTING IS AND WHY IT IS IMPORTANT
Natural Lighting refers to any light created by the sunlight. The rules of lighting in photography still exist but this time it’s more difficult because you can’t control light, but the light controls you. Teaching yourselves to find, recognise, create or use light and shadow is essential be able to take powerful images no matter what camera you have in hand.
BASIC RULES OF LIGHTING (PHOTOGRAPHY, VIDEO)
One of the most importan rule to light a scene is the Three Point Lighting (TPL) rule. TPL focuses on the lighting positioning and uses three basic light devices placed in three different positions: key light, fill light and back light.
First, key light, which is the ligth with the strongest intensity, is placed above our subject in an angle of 45 degrees (commonly) from the right or left side. In that way the Key light will create a drop shadow on the other side of our subject and give us the feeling of depth. Of course you can adjust the position of the Key light as you see it fits. After positioning our Key light to the subject we will have some strong shadows to the other side. Then, we will use the Fill light, placing it to the opposite side of our Key light. Fill light should not be as strong as the Key light. It should be lighter enough to just break the shadows from our subject. Finally, we will need to light up a bit the backside of our subject, so we will use an extra lighting device called Back light. If our subject is a human being, we can call our Back light as Hair light because is focusing on the hair of our subject to break the shadows from the back of the subject’s head. Back light is creating an outline around our subject separating it from the backround.
If you have a good camera, with a high dynamic range, you can shoot your film only with natural light. Shooting with natural light can be tricky; any change in weather, sudden rain or clouds can interfere with the continuity of your scene and shooting schedule. If you’re aiming to shoot during magic hours, make sure your location gives you the open space for this kind of light. Magic hours are the periods just before sunrise and just after sunset. These positions of the sun create an even light, which is usually in golden or blue color, making easy to use this quality of light to create beautiful images. You should take into account the time limitation when shooting in magic hour, because it lasts only up to 30 minutes.
NATURAL LIGHT TYPES
There are many types of how the light comes in your image. These are a few of them:
Rembrandt lighting
Rembrandt lighting is a technique where half of the subject’s face is in shadow and an inverted triangle of light appears below the eye on the shadow side of the face.
The photo below was taken with direct sunlight in the late afternoon. The shadow appears in the opposite site of the position of the camera.
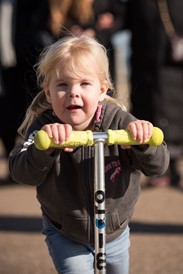
Image Copyright © TheLensLounge
Split lighting
Split Lighting is when you place a light at 9’clock or at 3’clock and half of your subject’s face is in the shadow.
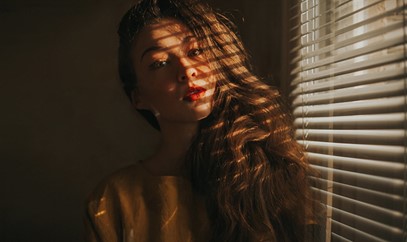
Image Copyright © ExpertPhotography
Backlighting
Backlighting, or also called Rim Light, is when you adjust the light at 12’clock directly behind your subject. This can be interesting to make a silhouette.
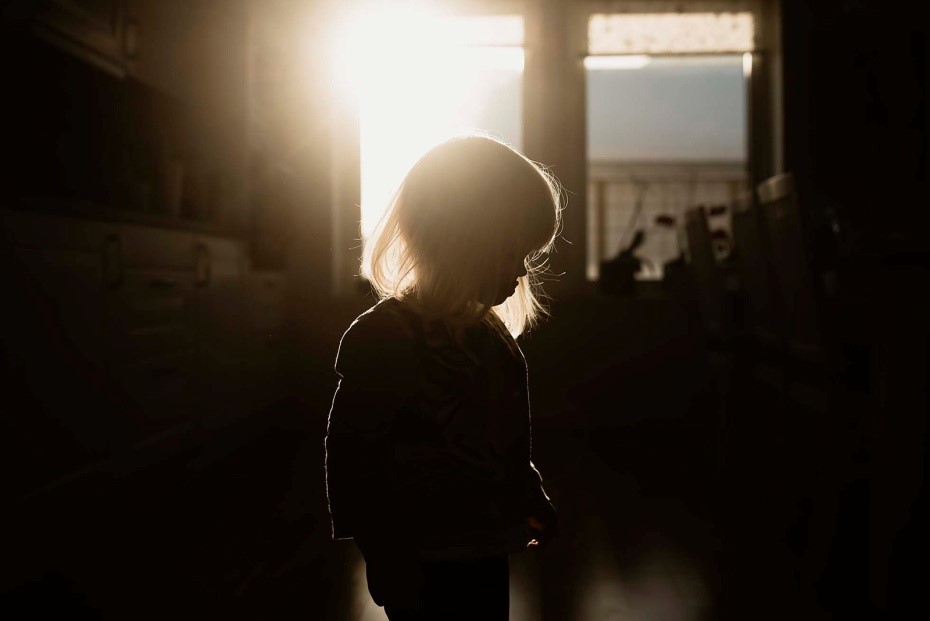
Image Copyright © ClickingMoms
HOW TO IMPROVE YOUR NATURAL LIGHT SHOTS
The best way to improve your natural light shots is practising on your own to find your unique photography style. Shoot under different light, differents hours of the day (try morning, evening, at twilight etc.) and see the results that each angle brings. Check your ISO, your White Balance, the exposure compensation, check all your camera settings as often as you can to see how natural ligthing is affecting:
1. When you set a high ISO value in your camera, the sensor digitally amplifies the signal of the captured light and, thus, a brighter image is produced. This gives the feeling that the exposition has been increased. On the other hand, when you set a low ISO value, the sensor amplifies the captured signal to a lesser extent, so the resulting image is darker. This gives the impression that the exposition is lower.
2. White balance is the photographer's tool to decide what colors he/she wants to appear in the photo and be more creative. The camera (both reflex and mobile phone) will allow us to select the type of light we see (cloudy, sun, shadow, night, flash) in the WB setting.
3. Exposure Compensation allows photographers to override exposure settings picked by camera’s light meter, in order to darken or brighten images before they are captured.
Generally, it is better to expose for the highlights than for the shadows. Also, a tip for portrait photography in natural lighting is to make sure that the eyes of your subject are well lit. Without the proper knowledge of light, you cannot expose properly to create the effect you want to show in your image. You need to understand not only the qualities of light (intensity, direction, quality and color), but also the difference between incident and reflected light. This will allow you to use your equipment to expose correctly and get the most of the differents scenes of your video. For example, when shooting outdoors, you should expose in a completely different way if you choose the time of day when the light is less intense (golden hour, blue hour and twilights) or more intense (rest of hours of the day). A good tip is to take advantage of the moments of the day with soft light, that is, the golden hour and the blue hour.
Then, we should distinguish between:
- Incident light: it is the light received by the object to be photographed. If we work with a photometer external to the camera, we can measure the light that reaches the object in the exact place where we want to take the photograph, so we could configure the diaphragm aperture, speed and ISO for that light it receives.
- Reflected light is that which is reflected off the object and reaches the camera. This is measured with the camera's own photometer and is less accurate than incident light measurement. However, it is the most common case for amateur or beginner photographers.
Also, you need to undertand the four qualities of light:
Intensity (high or low): the intensity of the light tells us how much light is present in the scene we want to photograph, and it is necessary to identify it correctly if we want our photograph to be well exposed. A high intensity means that there will be a lot of light, on the contrary a low intensity indicates that there is little light. Underexposure occurs when the amount of light is poor, causing a significant loss of information. On the contrary, overexposure reveals that there is an excess of light that we can compensate by reducing the sensitivity, closing the aperture more or increasing the shutter speed.
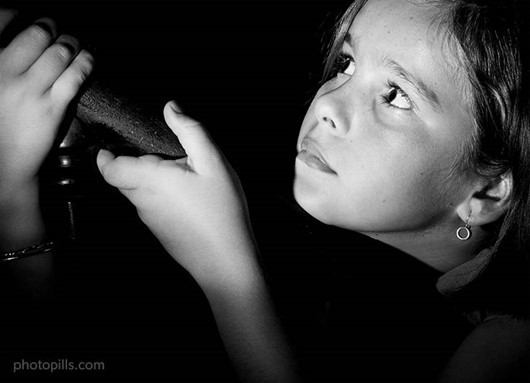
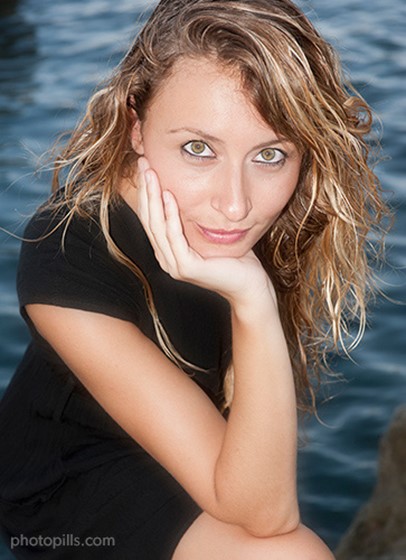
Nikon D700 | 85mm | f/8 | 1/125s | ISO 200 | 6250K. Image with high intensity of light focused mainly on the face. Credits: © PhotoPills
Direction ( front, side, rear, zenith or nadir): The direction of the light is the angle at which it falls on the subject and determines many of the effects that you can perform with the camera. It is important to note that the address is not usually unique, but rather the most of the time it is a combination of several different sources. In general, the light can have several types of direction:
- Front: located in front of the subject, so it illuminates all its visible surfaces. Highlight the color but remove shadows, subtracting volume and texture.
- Side: it hits the subject at an angle to the shooting direction. Thanks to this light, the viewer has a sensation of volume by increasing the texture of the subject.
- Rear:the light is coming from behind the subject. Helps to highlight your silhouette but it subtracts information from other elements such as color or texture.
- Zenith: the light comes from a single point vertically above the subject.
- Nadir: The light comes from below. This situation rarely occurs under natural conditions.
Nikon D700 | 85mm | f/8 | 1/80s | ISO 200 | 5500K. Image with frontal lighting. Credits: © PhotoPills
Quality (hard or soft): Quality describes the relationship between the size of the source that emits the light and that of the object we are photographing. It depends on whether the shadows appear hard or soft. The first, the hard one, appears when the size of the source that emits the light is small compared to that of the object we are photographing, and generates marked shadows, as well as an intense contrast between the illuminated areas and the shadowed areas. It is interesting to achieve a high level of detail. In contrast, soft light appears when the source that emits the light is large compared to the photographed object, or is reflected off a wide surface. The shadows it gives us are less marked than when we use hard light, so it offers us less detail, but also pleasant colors.
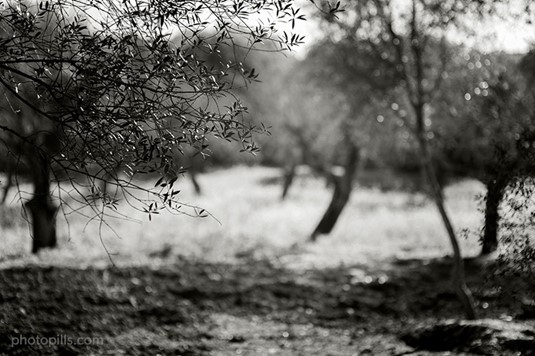
Nikon D700 | 85mm | f/2 | 1/1500s | ISO 200 | 5700K. Hard light image focused on the detail of the branches. Credits: © PhotoPills
Color (warm or cold): color is not an intrinsic characteristic of objects, but is determined by the way the object interacts with white light and by the way our brain interprets the information it receives. When white light falls on any object, a part of its energy is absorbed, while another part of its wavelength is reflected. It is the latter that determines what color we see it. To accurately identify color we use the concept of color temperature, which indicates the color of the light emitted by a source between red (warm) and blue (cold)
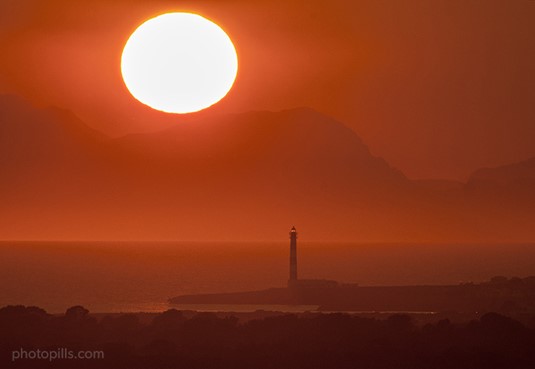
Nikon D300 | 500mm | f/6.7 (escala de ½ paso) | 1/1500s | ISO 200 | 7500K. Image with warm light. Credits: © PhotoPills
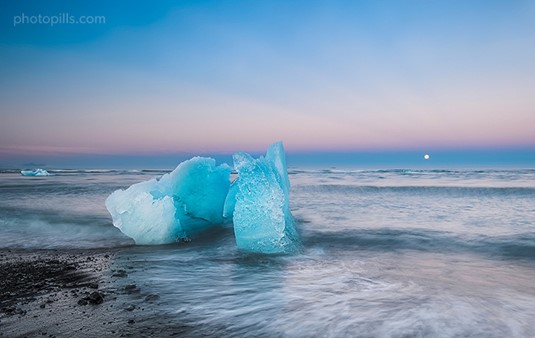
Nikon D4s | 24mm | f/11 | 1s | ISO 100 | 7500K. Image with cold light. Credits: © PhotoPills
Finally
As we said before, to take the ideal shot you have to first find your technique and style. That way you can take photos that represent you, but don’t forget to follow some basic rules. They exist to make your life easier.
Conclusions
Depending on how you use the light, you get one result or another, expressing in different ways what you saw or what happened. Shooting in Natural Lighting is a great experience that everyone can have. It can bring amazing results when you know how to work with it.
Video and PDF presentationPulsa para colapsar
The following video explains the content of this lesson and shows some examples:
Here you have the content of the video in pdf in case you need to use it in your classroom:
Pill T2.L4 Tips for natural lightingPulsa para colapsar
Pill T2.L4 Tips for natural lighting
In this pill you will learn some tips to record a footage with natural light:
Lesson contents in PDFPulsa para colapsar
Here you have the contents of the lesson in PDF: